# Flipper UI
> Flipper UI is a self-hosted web interface that gives you access to the basics but does not offer the full functionality of Flipper Cloud.
While you can use Flipper UI in conjunction with Flipper Cloud, it would be redundant since Flipper Cloud offers a superset of the functionality provided through Flipper UI.
## Screenshots
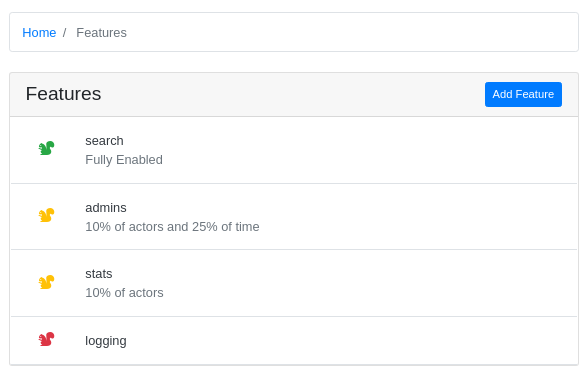
Viewing list of features:
Viewing list of features in self-hosted UI
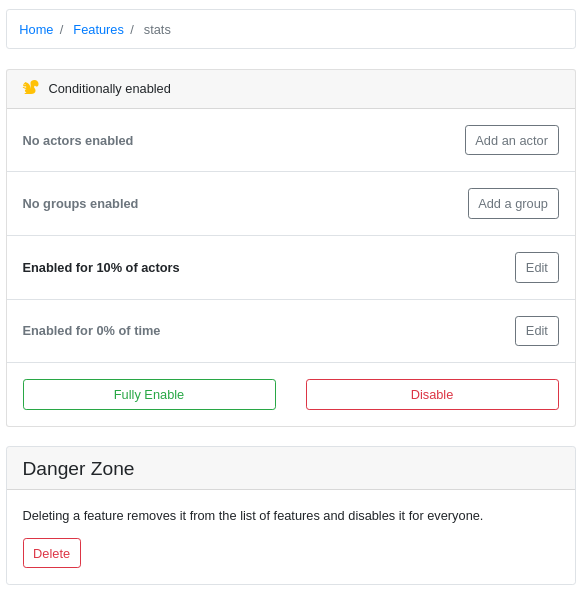
Viewing an individual feature:
Viewing an individual feature in self-hosted UI
## Installation
Add it to your application's Gemfile with:
$ bundle add flipper-ui
Or install it yourself as:
$ gem install flipper-ui
## Usage
### Rails
Given that you've already initialized `Flipper` as per the [flipper](https://github.com/flippercloud/flipper) readme, you can mount `Flipper::UI` to a route of your choice:
```ruby
# config/routes.rb
YourRailsApp::Application.routes.draw do
mount Flipper::UI.app(Flipper) => '/flipper'
end
```
If you'd like to lazy load flipper, you can instead pass a block to initialize it:
```ruby
# config/routes.rb
YourRailsApp::Application.routes.draw do
flipper_block = lambda {
# some flipper initialization here, for example:
adapter = Flipper::Adapters::Memory.new
Flipper.new(adapter)
}
mount Flipper::UI.app(flipper_block) => '/flipper'
end
```
#### Security
You almost certainly want to limit access when using Flipper::UI in production.
##### Basic Authentication via Rack
The `Flipper::UI.app` method yields a builder instance prior to any predefined middleware. You can insert the `Rack::Auth::Basic` middleware, that'll prompt for a username and password when visiting the defined (i.e., `/flipper`) route.
```ruby
# config/routes.rb
flipper_app = Flipper::UI.app do |builder|
builder.use Rack::Auth::Basic do |username, password|
# Verify credentials
end
end
mount flipper_app, at: '/flipper'
```
##### Route Constraints
It is possible to use [routes constraints](http://guides.rubyonrails.org/routing.html#request-based-constraints) to limit access to routes:
```ruby
# config/routes.rb
flipper_constraint = lambda { |request| request.remote_ip == '127.0.0.1' }
constraints flipper_constraint do
mount Flipper::UI.app => '/flipper'
end
```
Another example is to use the `current_user` when using a gem-based authentication system (i.e., [warden](https://github.com/hassox/warden) or [devise](https://github.com/plataformatec/devise)):
```ruby
# initializers/admin_access.rb
class CanAccessFlipperUI
def self.matches?(request)
current_user = request.env['warden'].user
current_user.present? && current_user.respond_to?(:admin?) && current_user.admin?
end
end
# config/routes.rb
constraints CanAccessFlipperUI do
mount Flipper::UI.app(Flipper) => '/flipper'
end
```
### Standalone
Minimal example for Rack:
```ruby
# config.ru
require 'flipper/ui'
adapter = Flipper::Adapters::Memory.new
flipper = Flipper.new(adapter)
run Flipper::UI.app(flipper) { |builder|
builder.use Rack::Session::Cookie, secret: "something long and random"
}
```
The key is that you need to have sessions setup. Rails does this for you, so this step isn't necessary, but for standalone rack, you'll need it. Without sessions setup, you will receive a Runtime error like:
```
RuntimeError: you need to set up a session middleware *before* Rack::Protection::RemoteToken.
```
See [examples/ui/basic.ru](https://github.com/flippercloud/flipper/blob/main/examples/ui/basic.ru) for a more full example
### Configuration
Flipper UI can be customized via `configure`, which yields a configuration instance.
#### Description
We can associate a `description` for each `feature` by providing a descriptions source:
```ruby
Flipper::UI.configure do |config|
config.descriptions_source = ->(keys) do
# descriptions loaded from YAML file or database (postgres, mysql, etc)
# return has to be hash of {String key => String description}
end
# Defaults to false. Set to true to show feature descriptions on the list
# page as well as the view page.
# config.show_feature_description_in_list = true
end
```
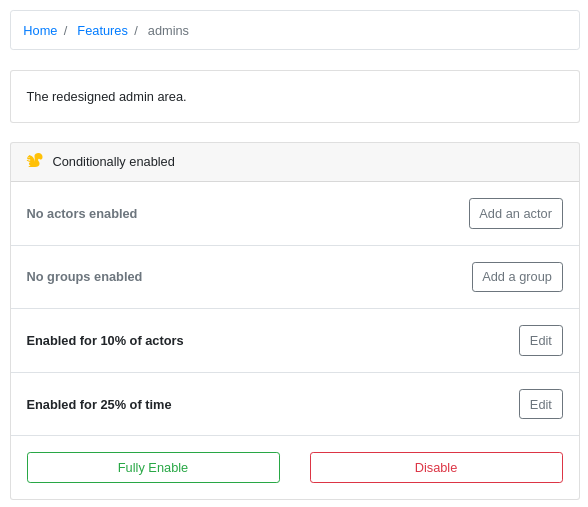
Descriptions show up in the UI like so:
Viewing flipper feature descriptions in self-hosted UI
#### Banner
Flipper UI can display a banner across the top of the page. The `banner_text` and `banner_class` can be configured by using the `Flipper::UI.configure` block as seen below.
```ruby
Flipper::UI.configure do |config|
config.banner_text = 'Production Environment'
config.banner_class = 'danger'
end
```
By default the `environment` is set to an empty string so no banner will show. If you wish to customize the look of the banner, you can set `banner_class` to one of the bootstrap color classes: `primary`, `secondary`, `success`, `danger`, `warning`, `info`, `light`, or `dark`. The default `banner_class` is `danger`.
The above configuration results in:
Viewing banner in self-hosted UI
#### Actor names
Resolve actor ids to human-readable names by providing an actor names source:
```ruby
Flipper::UI.configure do |config|
config.actor_names_source = ->(actor_ids) {
# Lookup actor_ids here and return hash, e.g.
{
"User;1" => "Dr. Paul Rhoades"
}
}
end
```
#### Fun mode
By default, Flipper UI displays a videoclip when there are no flags. The `fun` mode can be configured by using the `Flipper::UI.configure` block as seen below.
```ruby
Flipper::UI.configure do |config|
config.fun = false
end
```
## Import / Export
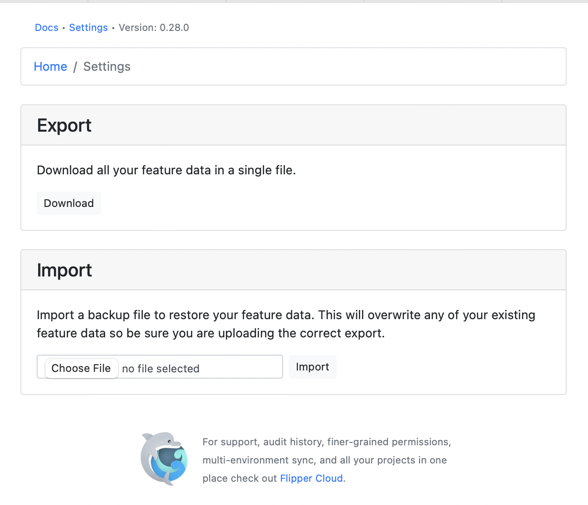
Flipper UI supports importing and exporting features. This is useful for sharing features between environments or backing up features.
- To export a backup file, click Download. This file can be shared with other developers or used to restore features to another environment. You can also import this file into Flipper Cloud for easy migration.
- To import a backup file, choose it from the Import form and click Import.
Viewing import and export in self-hosted UI